
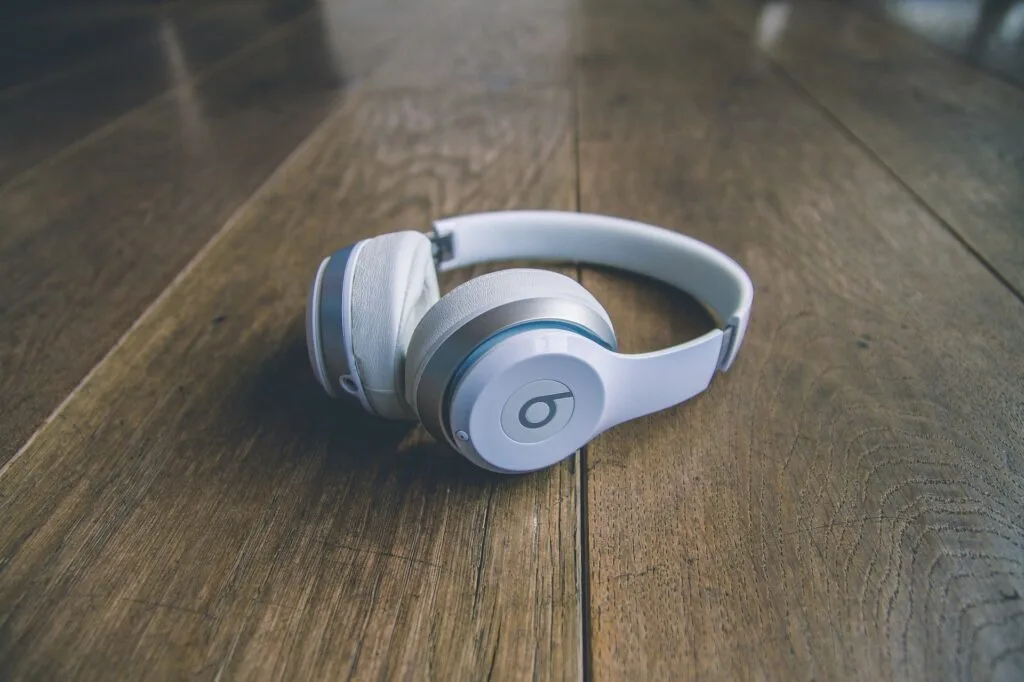
The Beats Solo 3 headphones are popular among music lovers due to their excellent sound quality and sleek design. While many people may be aware of some of these headphones’ features, several hidden features take time to be noticeable.
In this article, we will explore 10 Beats Solo 3 hidden features you may not have known about, including tips and tricks that will enhance your listening experience and make using these headphones even more enjoyable. Whether you’re a long-time user or just getting started with your Beats Solo 3 headphones, these hidden features will impress and improve your overall experience.
Table of Contents
10 Beats Solo 3 Hidden Features: You Need to Know
The Beats Solo 3 headphones are a trendy choice for music lovers thanks to their excellent sound quality and stylish design. However, did you know several hidden features you may need to know? Below are we explore the 10 hidden features of Beats Solo 3 headphones that you may still need to discover.
1. Automatic On/Off
One of the most convenient features of the Beats Solo 3 headphones is automatic on/off function. When you fold the headphones, they automatically turn off, and when you unfold them, they turn back on. This feature helps conserve battery life and ensures you always remember to turn off your headphones when you’re finished using them.
2. Fast Charging
Another great feature of the Beats Solo 3 headphones is Fast Fuel charging. With just 5 minutes of charging, you can get up to 3 hours of playback time. This is perfect when you must quickly charge your headphones before heading out.
3. Audio Sharing
You can share audio with other Beats Solo 3 headphones. Hold down the “b” button on both pairs of headphones until they start flashing. Once paired, you can listen to the same music or watch the same movie with a friend or family member.
4. Siri Integration
You can use Siri integration with the Beats Solo 3 headphones if you’re an iPhone user. Hold the “b” button to activate Siri and ask her to play music, make a phone call, or send a message.
5. Audio Controls
The Beats Solo 3 headphones have built-in audio controls that make it easy to adjust the volume, skip tracks, and pause or play your music. You can also activate Siri or take phone calls using the same controls.
6. Multi-Device Pairing
The Beats Solo 3 headphones can be paired with multiple devices at once, making it easy to switch between your phone, tablet, and computer without having to disconnect and reconnect every time.
7. Noise-Canceling
Noise-cancelling headphones have been around for quite some time, but the Beats Solo 3 takes things to a new level. With its advanced noise-cancelling technology, the Beats Solo 3 is one of the most sought-after headphones on the market.
The Beats Solo 3 uses two microphones to monitor external noise and then creates a counter sound wave to cancel out the noise. This allows you to enjoy your music without distractions, even in noisy environments like aeroplanes, trains, or crowded public spaces.
One of the most impressive features of the Beats Solo 3 noise-cancelling technology is its ability to adapt to your environment. The headphones use real-time audio calibration to adjust the noise-cancelling levels according to the ambient noise level. This means you don’t have to change the headphones manually to get the perfect sound.
8. Share Your Audio with Dual-Mode
If you want to share your music with someone else, use the Dual-Mode feature on your Beats Solo 3 headphones. Connect your headphones to your device and have your friend connect their headphones to yours. You can then enjoy the same music simultaneously.
9. Enable or Disable Automatic Ear Detection
Beats Solo 3 headphones have automatic ear detection, which can pause the music when you remove the headphones and resume them when you put them back on. If you don’t want this feature, you can disable it from the Bluetooth settings on your device.
10. Battery Life
Finally, the battery life of the Beats Solo 3 headphones is awe-inspiring. With up to 40 hours of battery life, you can listen to your music all day without worrying about running out of power. Plus, the headphones come with a handy battery fuel gauge that shows you how much power you have left.
The Beats Solo 3 headphones have a lot of hidden features that make them even more convenient and enjoyable to use. These headphones have much to offer, from automatic on/off to Siri integration and multi-device pairing. If you’re a Beats Solo 3 user, use these hidden features to get the most out of your headphones.
How To Turn on Noise Cancelling on Beats Studio 3:
The Beats Studio 3 headphones are known for their exceptional noise-cancelling capabilities, which can help you enjoy your music or calls without any unwanted background noise. If you’re not sure how to turn the noise-cancelling feature on your Beats Studio 3, here’s a step-by-step guide:
1. Put your headphones on and turn them on
To turn on your Beats Studio 3 headphones, hold the power button on the left ear cup until the LED light on the headphones turns on.
2. Enable noise-cancelling mode
Hold the “b” button on the left ear cup for three seconds to turn on the noise-cancelling feature. You will hear a tone, and the headphones will switch to noise-cancelling mode.
3. Disable noise-cancelling mode
Hold the “b” button on the left ear cup for three seconds to turn off the noise-cancelling feature. You will hear a tone, and the headphones will switch to normal mode.
4. Switch between noise-cancelling and transparency mode
If you want to switch between noise-cancelling and transparency mode, press the “b” button twice quickly. Transparency mode allows you to hear your surroundings while listening to your music.
5. Turn off your headphones
To turn off your Beats Studio 3 headphones, hold the power button on the left ear cup until the LED light on the headphones turns off.
Turning on the noise-cancelling feature on your Beats Studio 3 headphones is easy and can significantly enhance your listening experience. Follow the steps outlined above, and you’ll be able to enjoy your music without any unwanted background noise.
Also Read: Bluetooth Headphones Cutting Out in Pocket: Causes and Fixes
How To Connect Beats Solo 3 To Laptop:
If you’re a music lover with Beats Solo 3 headphones, you may wonder how to connect them to your laptop. Fortunately, the process is straightforward, and you can enjoy your music quickly.
Here’s a step-by-step guide on how to connect your Beats Solo 3 headphones to your laptop:
Step 1:
Turn on your Beats Solo 3 headphones by pressing and holding the power button until the LED light flashes.
Step 2:
On your laptop, go to the Bluetooth settings. The location of the Bluetooth settings may vary depending on the operating system you’re using. For Windows 10, you can access Bluetooth settings by clicking on the Start menu, selecting Settings, clicking on Devices, and then selecting Bluetooth & other devices.
Step 3:
On your laptop, turn on Bluetooth if it’s not already on. If it’s on, you can skip this step.
Step 4:
On your laptop, click on the option to add a Bluetooth device. This option may be labelled as “Add Bluetooth or another device,” “Add a device,” or “Pair new device,” depending on your operating system.
Step 5:
On your Beats Solo 3 headphones, press and hold the power button for five seconds to put them in pairing mode. Flashing LED lights should be visible.
Step 6:
On your laptop, select the option to connect to a Bluetooth device. Your laptop should search for available Bluetooth devices.
Step 7:
On your laptop, select your Beats Solo 3 headphones from the list of available devices.
Step 8:
Follow the on-screen instructions to complete the pairing process. Once your laptop and headphones are connected, you should be able to listen to music or other audio on your laptop through your Beats Solo 3 headphones.
That’s it! You can enjoy your favourite tunes through your Beats Solo 3 headphones connected to your laptop. Remember to turn off your headphones and disconnect them from your laptop when you’re done using them to conserve battery life.
How To Connect Beats Solo 3 To Android:
The process may need to be clarified if you recently purchased Beats Solo 3 wireless headphones and want to connect them to your Android device. But don’t worry. As soon as you know what to do, it’s pretty simple.
Before we begin, ensure your Beats Solo 3 headphones are charged and turned on. Then, follow the steps below to connect your headphones to your Android device.
Step 1:
Turning on Bluetooth on your Android device is the first step. Make sure the toggle switch is turned on to enable Bluetooth.
Step 2:
To put your headphones in pairing mode, press and hold the power button until the LED light on the right earcup starts flashing. This means your headphones are now in pairing mode and ready to be connected to your Android device.
Step 3:
Once your headphones are in pairing mode, go back to the Bluetooth settings on your Android device and search for available devices. Your Beats Solo 3 headphones should appear on the list of available devices.
Step 4:
Click on the name of your Beats Solo 3 headphones on the list of available devices. Your Android device will now try to connect to your headphones. If prompted, enter the passcode “0000” to complete the connection.
Step 5:
Once your headphones are connected to your Android device, you should be able to hear audio through your headphones. You can test your connection by playing a song or video on your Android device.
And there you have it, you’ve successfully connected your Beats Solo 3 headphones to your Android device. If you have any issues, try resetting your headphones by pressing and holding the power button for 10 seconds until the LED light flashes red and white. Then, repeat the steps above to connect your headphones to your Android device.
Conclusion:
The Beats Solo 3 headphones are a stylish accessory with hidden features that users may need to know. From the ability to activate Siri or Google Assistant to customizing sound settings and sharing music with friends, the Beats Solo 3 headphones offer a variety of convenient features that can enhance the user experience. Using these hidden features, users can enjoy even more functionality and versatility from their headphones.
So, if you own a pair of Beats Solo 3 headphones, explore all the secret features and get the most out of your listening experience.
What are some of the hidden features of Beats Solo 3 headphones?
Some hidden features of Beats Solo 3 headphones include activating Siri or Google Assistant, customizing sound settings using the Beats app, and sharing music with friends using the Audio Sharing feature.
How do I reset my Beats Solo 3 headphones?
To reset your Beats Solo 3 headphones, hold power and volume down buttons for 10 seconds until the LED light flashes. This will reset your headphones to their default settings.
How do I use the Audio Sharing feature on my Beats Solo 3 headphones?
To use the Audio Sharing feature on your Beats Solo 3 headphones, bring your headphones close to your friend’s headphones and press the “b” button on one of the earcups. This will allow your friend to listen to the same audio as you.
How do I activate Siri or Google Assistant on my Beats Solo 3 headphones?
To activate Siri or Google Assistant on your Beats Solo 3 headphones, simply press and hold the “b” button on the left earcup.