Gaming headsets have become necessary for gamers worldwide, providing a more immersive and interactive experience. However, it can be incredibly frustrating when your Turtle Beach headset microphone stops working on your PS4 console. This issue can hinder your ability to communicate with your teammates, making gaming sessions less enjoyable. Luckily, there are a few simple solutions before throwing in the towel and purchasing a new headset.
In this article, we will explore how to fix a Turtle Beach headset mic that is not working on a PS4, providing you with the necessary steps to get back to gaming with clear and reliable communication.
If you are a gamer, you know the importance of having a good-quality headset with a working microphone. However, sometimes you may face issues with your Turtle Beach headset mic not working on PS4. This can be frustrating, especially in an intense game with your friends.
Table of Contents
Understanding The Problem:
Before we jump into the solutions, it’s essential to understand the problem. The Turtle Beach headset mic not working on PS4 can occur due to various reasons, including:
- Loose connections between the headset and the PS4 controller.
- Incorrect audio settings on the PS4.
- Outdated firmware of the headset.
- Physical damage to the microphone or headset.
Now that we better understand the problem let’s move on to the solutions.
Troubleshooting Steps to Fix Turtle Beach Headset Mic Not Working on PS4
Step 1: Check the Connections
You should first check the connection between the headset and the PS4 controller. Ensure that the headset is correctly plugged into the controller’s audio jack. You should also check the connections on both ends for any damages or loose wires.
Step 2: Adjust the Audio Settings on the PS4
Sometimes the audio settings on the PS4 can cause issues with the headset mic. To fix this, go to the PS4’s audio settings and select “Devices.” From there, select “Audio Devices” and then “Adjust Microphone Level.” Adjust the level to an appropriate volume and test the microphone again.
Step 3: Update the Headset Firmware
If the above steps do not work, try updating the firmware of your Turtle Beach headset. You can connect the headset to a PC and download the latest firmware from the Turtle Beach website. Follow the instructions provided on the website to update the firmware.
Step 4: Check for Physical Damage
If the issue persists, there may be physical damage to the microphone or the headset. Inspect the headset and microphone for any damages. If you find any damage, you may need to replace the headset or get it repaired.
Why Does My Mic Not Work On Turtle Beach Headset?
If you’re experiencing issues with your Turtle Beach headset’s microphone, you can try a few things to troubleshoot the problem.
Firstly, ensure the microphone is enabled in your computer’s audio settings. You can usually find these settings by right-clicking on the speaker icon in your system tray and selecting “Open Sound settings” or “Recording devices.” Once there, ensure your Turtle Beach headset is selected as the default recording device, and the microphone volume is turned up.
If your microphone isn’t working, try unplugging and replugging the headset’s USB or audio jack. The connection may have been loose, but reseating it could fix it.
Another possible solution is to update your headset’s drivers. The latest drivers are usually found on the Turtle Beach website or through the manufacturer’s software. Download and install the correct drivers for your headset model and operating system.
If none of these solutions work, there may be an issue with the microphone itself. The microphone may be damaged or defective, so contact Turtle Beach’s customer support for assistance.
How Do I Test My Turtle Beach Headset Mic?
If you own a Turtle Beach microphone and want to test it, there are a few simple steps to ensure it’s working correctly. Here are some tips on how to test your Turtle Beach mic:
1. Check the connections
Make sure your mic is correctly connected to your computer or gaming console. If using a wired headset, ensure the cable is securely plugged in. If you’re using a wireless headset, make sure the transmitter is properly plugged in and that your headset is paired with it.
2. Adjust the volume
Make sure the volume on your mic is turned up. You can do this by adjusting the volume control on your headset or by going into the audio settings on your computer or gaming console.
3. Record a test message
Open a voice recording app on your computer or gaming console and record a test message. Speak into the mic and listen to the recording to see if the sound quality is good and if your voice is picked up properly.
4. Test with a friend
Once you’ve recorded your test message, you can test your mic with a friend. Connect with them on a voice chat app like Discord or Skype and have them listen to you speak. Ask them if they can hear you clearly and if there are any issues with the sound quality.
5. Troubleshoot
If you’re having issues with your mic, try troubleshooting the problem. Check the manufacturer’s website for any updates or patches for your headset, and make sure your drivers are up to date. You can also try adjusting your computer or gaming console settings to see if that helps.
Also Read: Aftershokz Aeropex Microphone Not Working: How To Fix It
How To Connect Turtle Beach Headset To PS4:
If you’ve recently purchased a Turtle Beach headset and are wondering how to connect it to your PS4, don’t worry! Several simple steps are required to complete the process.
Step 1: Check the Compatibility
The first thing you need to do is ensure that your Turtle Beach headset is compatible with the PS4. While most Turtle Beach headsets are compatible with the PS4, checking the product specifications to confirm compatibility is always a good idea.
Step 2: Connect the Headset to the PS4 Controller
To connect your Turtle Beach headset to your PS4, you need to connect it to your PS4 controller. Follow the simple steps below to do it:
- Turn on your PS4 and controller.
- Connect the headset to the PS4 controller’s 3.5mm jack.
- You can adjust the volume on your headset to your preference.
Step 3: Adjust the Audio Settings
Once your headset is connected to the PS4 controller, you must adjust the audio settings to ensure the sound comes through your headset, not the TV speakers. Follow the simple steps below to do it:
- From the PS4 home screen, select Settings.
- Select Devices, then Audio Devices.
- Under Output to Headphones, select All Audio.
- Adjust the Volume Control (Headphones) and Microphone Level settings to your preferred levels.
Step 4: Test Your Headset
Once you’ve adjusted the audio settings, it’s time to test your headset. Follow the simple steps below to do it:
- From the home screen of your PS4, select Settings.
- Select Devices, then Audio Devices.
- Under Input Device, select the Turtle Beach headset.
- Speak into the microphone to ensure that it’s working correctly.
- Play a game or watch a movie to ensure the audio is coming through your headset.
Best Turtle Beach Headset For PS4 & PS5

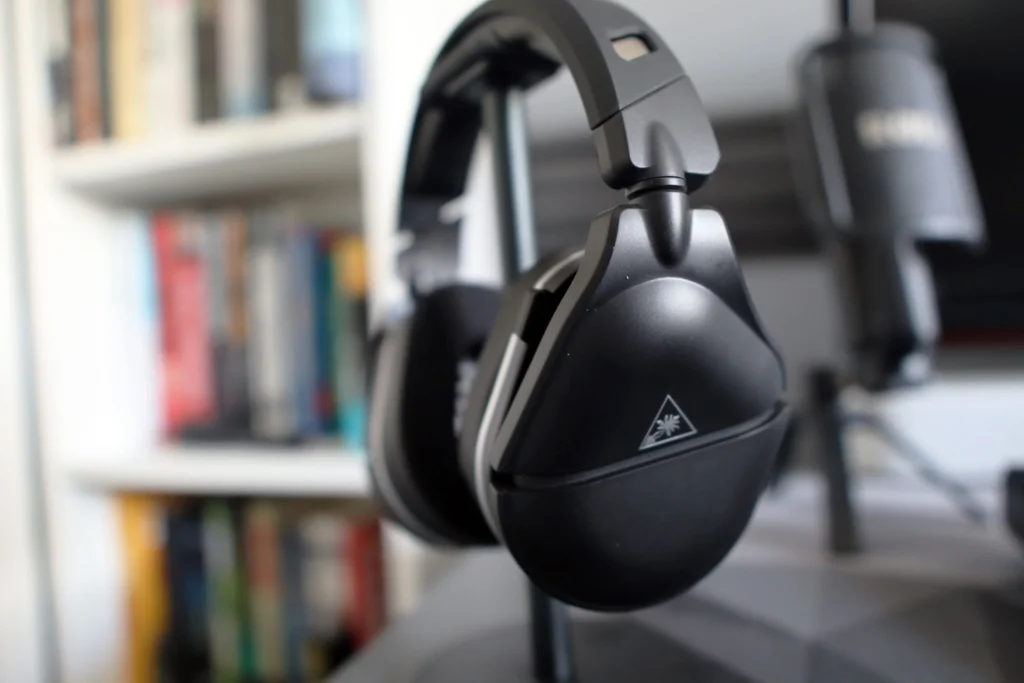
Turtle Beach Stealth 600 Gen 2
- Wireless Connectivity
- Great For Gaming
- Long Battery Life
Pros
- Wireless Connectivity
- 15-Hour Battery Life
- Flip-to-Mute Mic
- Spatial Audio
- Great For Gaming
Cons
- Bit Expensive
The Turtle Beach Stealth 600 Gen 2 Wireless Gaming Headset is worth considering if you’re in the market for a new gaming headset. It’s a well-designed, high-quality headset with excellent audio performance and impressive features.
One of the standout features of the Turtle Beach Stealth 600 Gen 2 is its wireless connectivity. You can connect it to your PS5, PS4, PS4 Pro, Nintendo Switch, or other compatible devices via Bluetooth and enjoy your games without being tethered to your console. This makes it an excellent option for gamers who like to move around while they play or who don’t want to worry about getting tangled up in cords.
The headset features 50mm speakers that deliver crisp, clear audio with excellent bass response. Whether you’re playing an action-packed shooter or a more atmospheric adventure game, you can hear all the details and nuances of the game’s audio with this headset. It also features spatial audio, which adds an extra layer of immersion to your gaming experience by creating a sense of 3D sound space.
The Turtle Beach Stealth 600 Gen 2 has a 15-hour battery life, which is impressive for a wireless gaming headset. You can quickly get through a full day of gaming without worrying about recharging. The headset also has a flip-to-mute mic, a great feature for gamers who want to quickly mute their mic without fumbling around with buttons.
Overall, the Turtle Beach Stealth 600 Gen 2 Wireless Gaming Headset is an excellent option for gamers looking for a high-quality, wireless headset with excellent audio performance and great features. This one is worth considering if you’re in the market for a new gaming headset.
Conclusion:
The Turtle Beach headset mic not working on PS4 can frustrate any gamer. However, there are several steps you can take to troubleshoot the problem and get your mic up and running again. By checking your connections, adjusting your settings, updating your console and headset firmware, and testing your mic in other applications, you can determine the root cause of the issue and take steps to fix it. With patience and persistence, you’ll be back to chatting and gaming with your friends in no time.
FAQs
Why isn’t my Turtle Beach headset mic working?
There could be several reasons why your Turtle Beach headset mic isn’t working. Some common causes include a loose or disconnected cable, a faulty microphone, outdated or incorrect audio drivers, or incorrect audio settings on your computer or gaming console. It’s important to troubleshoot each of these possibilities to determine the root cause of the issue.
How can I troubleshoot my Turtle Beach headset mic not working?
You can take several steps to troubleshoot your Turtle Beach headset mic. First, ensure that the microphone is securely connected to the headset and that the headset is correctly plugged into your computer or gaming console. Next, check your audio settings to ensure the correct input device is selected and the microphone isn’t muted. You may also want to update your audio drivers or reset your headset to its default settings.
How do I update my audio drivers?
To update your audio drivers, you can typically do so through your computer’s Device Manager. Right-click on the audio device and select “Update driver.” You may also need to download and install the latest drivers from the manufacturer’s website.
How do I contact Turtle Beach customer support?
You can contact Turtle Beach customer support through their website, which offers live chat, email, and phone support. You can also find helpful resources and troubleshooting guides on their website.